Studies Show the Barefoot Surcingle is Essential for Proper Training

BarefootSurcingle
Barefoot Surcingle is made with quality leather and plenty of D rings.

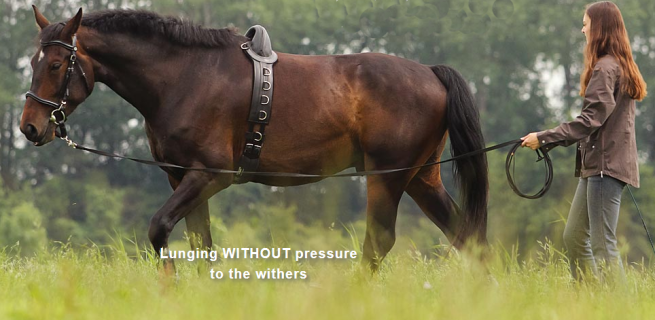
In an article written by Christa Leste-Lasserre for The Horse she relates studies done by Russell Guire, a PhD candidate at the Royal Veterinary College and a researcher at Centaur Biomechanics in the UK. The article titled, Training Aids: How Their Fit Could Help or Hinder Longeing Horses, discusses lungeing your horse for training using a surcingle, side reins, and other training aids. Leste-Lasserre writes “While science has already confirmed the usefulness of training aids…, improperly fitted training rollers [surcingles] could be squelching any benefit these systems offer.”

“ ‘We’ve noted significant pressure under the training roller that’s close to the pressure found during a sitting trot,’ Guire said. ‘Most rollers don’t have trees, so when they’re tightened up, they put that pressure directly onto the horse’s spine at about the level of T12-T13 (thoracic vertebrae). We believe that this pressure could reduce any benefits the horse could have from the training aids. Previous studies by the same team have already indicated that pressure at T12-T13 inhibits locomotion.’”

The Barefoot  Surcingle imported from Germany solves this issue of pressure on the back and withers. The pommel of the surcingle protects the horse’s withers and spine. Underneath the Barefoot Surcingle pommel the withers remain unrestricted and there is no pressure – neither on the withers nor along the sides. The supports on both sides are padded softly and extra wide, so that muscles can develop without being squeezed.

BarefootLongLinesLIVE
Barefoot Surcingle in use with Barefoot Super Grip Long Lines

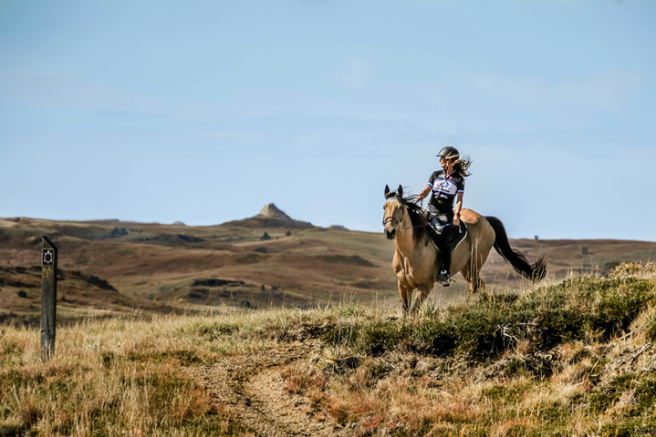
Lungeing and ground driving is a great training tool that can be used to introduce young horses to the bit, and to tune up and advance older horses. Working properly with a surcingle and side reins or long lines, the horse is encouraged to flex to the pressure of the bit at the pole and lift and round his back. Developing the horse’s top line in this manner helps the horse to carry the weight of the rider in balance and comfort. Using the Barefoot Surcingle will insure you are building muscle properly without impeding the forward motion and stride of your horse.

Training a Relaxed and Happy Trail Horse

RidersTrailKerrits

Out on the trail is not the ideal time to train. That’s why we ride in an arena in a controlled environment. If you don’t have a fenced arena, create yourself a training area by roping off a section of your pasture, or put logs or poles on the ground to cordon off your training space. It’s not fun to discover that your horse’s brakes don’t work all that well when you pick up the canter with a couple of your riding cronies. Just as dangerous as no brakes is a sticky gas pedal. Your horse must know that going forward when asked is not a negotiable request. You can check your horse’s response to your aids by testing him in the arena. Take every opportunity to ride through the puddle, past the flapping jacket on the arena gait, walking over ground poles, riding in company and by yourself. Once you feel you are completely in charge and are comfortable with your horse’s response and cooperation in all gaits, you are ready to venture out.

Going out on the trail should mean a relaxing time for your horse. When you start out with a young horse, a new horse, or tuning up your horse, take baby steps to develop your horse’s attitude about the trail. You should first establish that trail riding means walking. Go for a short walk at the end of an arena session. Your horse is in a great state of mind to relax and just walk to cool down. Your first trail rides can be around the barn and around the property. Make the ride in a circular pattern. Don’t go out in one direction, make a 180, and then head straight back that might encourage anticipating returning home.

With your riding buddies, take turns leading the way, riding in the middle and following. If your horse acts up in any one of these positions, change back to his comfort zone position, and then give him short doses of what he doesn’t like. That way he doesn’t work himself up, and stays in a relaxed state of mind. Eventually you should be able to ride anywhere you like.

Increase the distance and time of your trail rides by increasing the circumference of your circle. Around the barn, over the hill, and back down the road. Then around the barn, over the hill, across the road to the next field and then back down the road. You get the idea. You and your horse will have no worries as the next steps are never too challenging. Follow a riding buddy to help you across the creek for the first time. Always set yourself up for success.

Once your horse proves to you he knows the trail is for relaxation, you can pick up the trot somewhere in the middle of your ride for a short period. Return to walk to be sure your horse maintains his calm walking demeanor. After several weeks, or months, you can add a loping or canter session keeping an eye on his attitude. Always quit while you’re ahead, there is always another ride tomorrow. Taking the time to advance your rides with baby steps can help the development of your laid-back and happy trail horse. And the old saying, “walk the first and last mile” is still sound advice.

What’s in YOUR Saddle Bag?

LindsayNicholsBarefootAtlantaLIVE
This gorgeous trail riding photo was shared by Action Rider Lindsay Nichols

What should you carry in your saddle bag? The length of your ride and whether you are going on familiar trails or exploring new horizons will obviously have some bearing on what you take with you. Although it is impossible to carry everything for every emergency scenario, there are some practical items that are often needed and can really come in handy.

Here are some suggestions of practical items to consider putting in your saddle bag: Water, water purification tablets, fly repellent, trail mix, wire cutting tool, sunglasses, tissue, camera, small flashlight, pepper spray, hoof pick, Band-Aids, Dy’s Liquid bandage, Vetrap, pain reliever, antihistamine, bear bell or little bells to ward off critters, an Easyboot, folding water bucket, folding saw to cut branches and trees from blocked trail, Multi-purpose tool, pocket knife, signal whistle, map, and compass.

There is a First Aid Kit available that comes in a soft pack that fits in most saddle bags. It includes 40 items including a First Aid Guide, bandages, gauze pads, butterfly closures, wound dressing, antiseptic towellets, Povidone-iodine prep pads, needle, moleskin, safety pin, and latex gloves. There is also a small item that can make a difference for your safety, it’s Rein Safe. It prevents you from loosing your reins when your horse takes a drink from a stream, or you take a photo and drop your reins for a moment.

What size saddle bag should you carry? There is a huge selection of fabrics, styles, and sizes of saddle bags, carriers and ties that attach to your English, western, endurance or Aussie saddle and saddle pads with pockets. If you become separated from your horse, there are carriers that attach to your ankle, wrist or waist for your cell phone.

In the event that you did not take something for an emergency that arises while out on trail, and your cell phone has no service, be sure you have told someone where you are going to ride and approximately how long you will be gone. Then if you don’t show up back at the barn, someone will know where to look for you.

ActionRiderTack.com has an extensive selection of trail riding gear for trail riders and their horses.